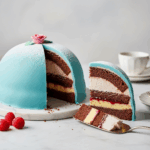
Vegan Chocolate Princess Cake (Chokladprinsesstårta)
Indulge in a show-stopping twist on a Swedish classic with our Vegan Chocolate Princess Cake. We've reimagined the royal favorite with rich chocolate sponge and a stunning pastel-blue marzipan top for a truly unforgettable dessert.
Servings 12
Calories 729kcal
Equipment
- 22 cm round baking pan
- mixing bowls
- Whisk
- kitchen scale
- Saucepan
- Stand mixer with whisk attachment or electric hand mixer
Ingredients
Part 1: Vegan Chocolate Sponge Cake
- 2 ⅛ cups (290 g) all-purpose flour
- ¾ cup (73 g) unsweetened cocoa powder
- 2 ¾ tsp baking powder
- 1 cup (206 g) granulated sugar
- ⅓ tsp salt
- 1 ¾ cups (436 ml) warm water or plant-based milk (like oat or soy milk)
- 110 ml strong brewed coffee, warm 90 ml
- 145 ml neutral vegetable oil (like canola or sunflower oil)
- 1 ¾ tbsp apple cider vinegar
Part 2: Vegan Vanilla Custard
- 1 ¼ cups (290 ml) plant-based milk e.g., almond or soy milk
- 1 ¼ cups (290 ml) vegan whipping cream e.g., oat-based
- ½ cup (103 g) granulated sugar
- 3 ½ tbsp (48 g) cornstarch
- 1 ¼ tbsp vanilla sugar or 1 ¼ tsp vanilla extract
- 2 ½ tbsp vegan butter or margarine
Part 3: Vegan Chocolate Whipped Cream
- 1 can (13.5 oz or 400 ml) full-fat coconut milk or coconut cream chilled in the refrigerator for at least 12 hours
- 5 tbsp powdered sugar
- 4 tbsp unsweetened cocoa powder sifted
- ½ tsp vanilla extract
Part 3: Vegan Chocolate Whipped Cream (Coconut-Free Alternative)
- 1 ¾ cups (414 ml) vegan whipping cream (oat-based is recommended), well-chilled
- 6 tbsp powdered sugar
- 5 tbsp unsweetened cocoa powder sifted
- ⅔ tsp vanilla extract
Part 4: Assembly
- ¾ cup (190 ml) high-quality raspberry jam
- 500 g green marzipan
- Powdered sugar for dusting
Instructions
Part 1: Vegan Chocolate Sponge Cake
- Preheat your oven to 350°F (180°C). Grease the baking pan and line the bottom with parchment paper .
- In a large bowl, sift together the flour, cocoa powder, and baking powder. Whisk in the sugar and salt .
- In a separate measuring cup or bowl, whisk together the warm water (or plant milk), warm coffee, oil, and apple cider vinegar .
- Pour the wet ingredients into the dry ingredients and stir with a whisk until just combined. The batter will be quite runny, which is normal .
- Pour the batter into the prepared pan and bake for about 40-45 minutes, or until a toothpick inserted into the center comes out clean. Be careful not to overbake it .
- Let the cake cool completely in the pan before turning it out onto a wire rack. For best results, wrap the cooled cake and chill it for a few hours or overnight. This makes it much easier to slice into layers .
Part 2: Vegan Vanilla Custard
- In a saucepan, whisk together the plant-based milk, vegan cream, sugar, and cornstarch until smooth .
- Place the pan over medium heat and bring to a simmer, whisking constantly to prevent lumps.
- Continue to cook, still whisking, until the custard has thickened considerably.
- Remove from the heat and stir in the vanilla and vegan butter until melted and combined .
- Transfer the custard to a bowl, cover the surface directly with plastic wrap to prevent a skin from forming, and chill completely in the refrigerator .
Part 3: Vegan Chocolate Whipped Cream
- Carefully open the chilled can of coconut milk without shaking it. Scoop out the thick, solidified cream from the top into the chilled mixing bowl, leaving the watery liquid behind .
- Using the mixer, whip the coconut cream on medium-high speed until it becomes fluffy and forms stiff peaks .
- Add the powdered sugar, sifted cocoa powder, and vanilla extract. Whip again on low speed until just combined. Do not overmix .
- Keep the chocolate whipped cream refrigerated until you are ready to assemble the cake.
Part 3: Vegan Chocolate Whipped Cream (Coconut-Free Alternative)
- Ensure your vegan whipping cream is thoroughly chilled according to the package directions. Pour it into a chilled mixing bowl.
- Using a stand mixer or electric hand mixer, whip the cream on medium-high speed until it begins to thicken and forms soft peaks.
- Add the powdered sugar, sifted cocoa powder, and vanilla extract to the bowl.
- Continue to whip on high speed until the cream is fluffy and holds stiff peaks. Be careful not to overmix.
- Keep the chocolate whipped cream refrigerated until you are ready to assemble the cake.
Part 4: Assembly
- Once the chocolate sponge cake is fully chilled, use a long serrated knife to carefully slice it horizontally into three even layers .
- Place the bottom layer on your serving plate or cake stand. Spread an even layer of raspberry jam over it .
- Pipe or spread the chilled vanilla custard on top of the jam, leaving a small border around the edge .
- Place the second cake layer on top of the custard.
- Now, create the dome. Mound the chocolate whipped cream onto the center of the second cake layer, using a spatula to shape it into an even dome .
- Place the third and final cake layer on top of the cream dome, gently pressing it down to secure it. You can trim this layer to be slightly smaller to help with the dome shape.
- On a surface dusted with powdered sugar, roll out the green marzipan into a large circle, about ⅛-inch (3-4 mm) thick. It needs to be large enough to cover the entire cake .
- Carefully lift the marzipan and drape it over the cake, smoothing it down gently over the dome and around the sides. Trim any excess marzipan from the bottom.
- For a classic finish, dust the top with a little powdered sugar. You can also craft a small pink marzipan rose for decoration if you feel adventurous .
- Chill the finished cake for at least an hour before serving to allow the layers to set. Enjoy your masterpiece
Notes
Chef’s Notes
There are several fantastic plant-based alternatives that whip up beautifully. Many modern vegan whipping creams are made from oats or soy and are designed to be stable and easy to use . Another creative, homemade option is to use aquafaba, the liquid from a can of chickpeas, which whips into a surprisingly light and airy foam . For our Chocolate Princess Cake, I'd recommend using a store-bought vegan whipping cream made from oats. It has a neutral flavor that will let the chocolate shine through.Allergens:
- Gluten (from Wheat flour and Oat milk/cream)
- Soy (if soy-based milk or cream is used)
- Almonds (in the marzipan cover)
Emission Hotspots:
- Shop to home transportation, if a combustion car is used
- Cocoa, as cacao cultivation often occurs in deforested regions, contributing a substantial part of the cake's carbon footprint
Sustainability tips:
- Walk or bike to the supermarket
- Source cocoa and coffee responsibly: These tropical ingredients have the highest environmental impact in our recipe, often linked to deforestation. Look for brands with certifications like Rainforest Alliance or Fairtrade. These labels ensure the products are sourced from farms that follow more sustainable agricultural practices and ethical standards. Ideal would be cocoa/coffee grown in agroforestry systems.
- Upcycle the Cake Dome: Our recipe review noted that the sponge cake dome was cut off and not used. Don't throw it away! Crumble it up to make delicious cake pops (mixed with a little leftover custard or jam), use it as a base for a decadent trifle, or toast the crumbs to sprinkle over ice cream or yogurt for a crunchy topping.
- Repurpose Leftover Custard and Cream: If you have extra vanilla custard or chocolate whipped cream, they make fantastic standalone desserts. Serve the custard warm or cold with some fresh berries, or use the chocolate cream as a delightful fruit dip or a filling for cookies.
- Plan and Adjust Portions: The best way to reduce waste is to not create it in the first place. Referencing the "Tips" from our recipe review, consider scaling down the recipe from the start.
- Store It Smartly: To keep your finished cake fresh for as long as possible, store it in an airtight container in the refrigerator. You can also freeze individual slices, wrapping them tightly. This way, you can enjoy a perfect portion of cake weeks later with zero waste.